Simple 3D Roof with Turbocad
Rather than drawing the roof of your building manually, Turbocad offers you to automate this task for you with its tool "Roof" with amazing results. Now let's see how to use it !
note : The Roof tool is available on the Turbocad Deluxe, Turbocad Professional and Turbocad Pro Platinum versions. These 3 versions are available in free trial version and fully functional for 30 days :-). Click on the blue links to learn about
Steps to follow to make this roof in 3D
In this tutorial we will use a piece measuring 40 feet (12192mm) length X 20 feet (6096mm) deep X 8 feet (2438mm) height with a wall thickness of 12 inches (305mm). You can use any other room size if you wish. I added a tutorial at the bottom of this page to build these walls in 3D

First of all we must determine the horizontal plane (Workplane) on which we will deposit the lower part (seated) of our roof. To do this, select the Workplane - By facet tool by pressing the Major (up arrow) + Alt + F keys simultaneously. You can also select it by pressing the icon of the Workplane toolbox In the Turbocad toolbar
note : put your walls with a different color other than black in order to differentiate them from the roof that we will make lower

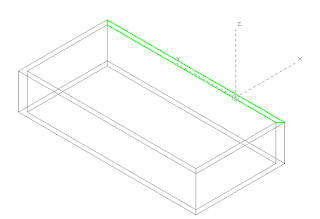
Moving your cursor over the top of one of the walls, a highlighted green line appears above the wall. Left click.
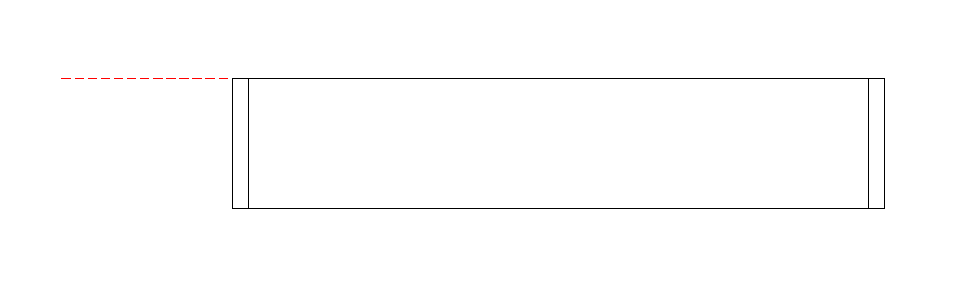
You are now on the right workplane. To ensure this, return to the Workplane toolbox and press the Show / Hide WorkPlane icon. A red dotted square appears to give you the orientation of the workplane


Select the front view and you see this same red line but this time horizontally and located on the top of the walls

Return to an isometric view. Now select the Roof tool from the drop-down menu
Architecture -- Roofs -- Add Roof

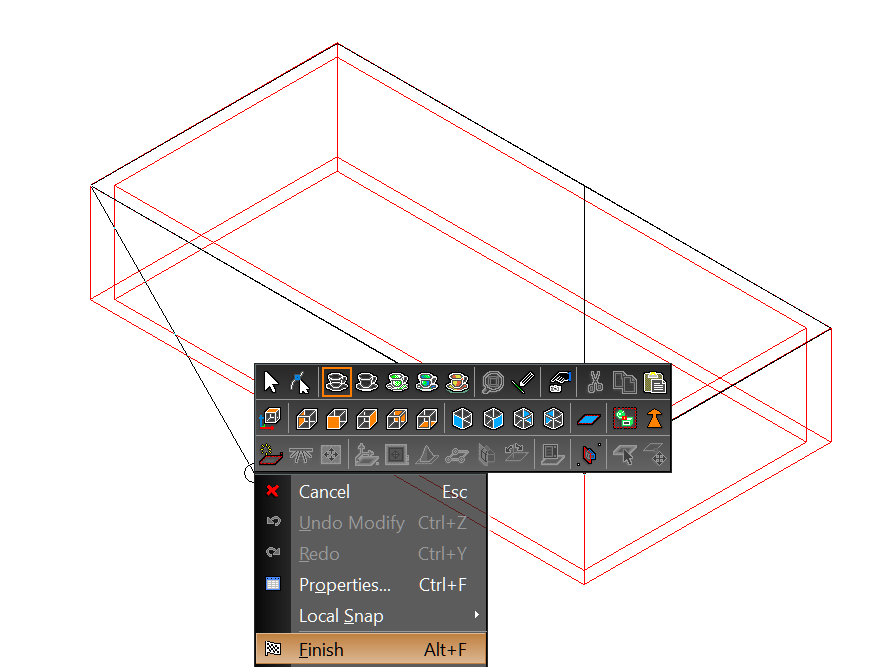
Now make sure the Vertex Snap mode is active and click the 4 top outer corners of your room. Once the fourth corner has been clicked, right click and select the Finish command (Alt + F)

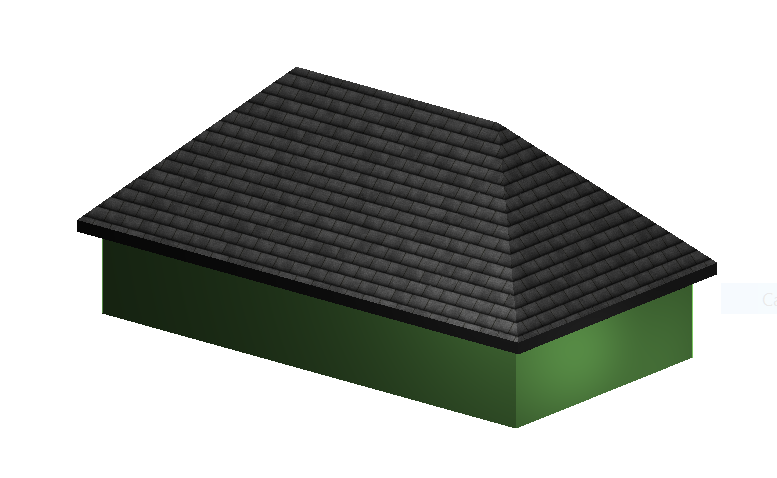
Change the viewing angle of your building so that you can see it clearly Congratulations you have just created your first roof in 3D with the Add Roof tool of Turbocad !

note : The Roof tool is available on the Turbocad Deluxe, Turbocad Professional and Turbocad Pro Platinum versions. These 3 versions are available in free trial version and fully functional for 30 days :-). Click on the blue links to learn more about
Now go further by changing the angles of the slopes, add a roof overhang and a fascia
We will now add volume to the roof by adding a roof overhang of 16 inches (406mm). Select the roof, right click on it, the Properties window appear and go to Roof category

In the Overhang box, enter 16 "or 406 if you are in the metric system and click OK.


In the Thickness box, enter 8 "or 200 if you are in the metric system and click OK. You will see the fascia appear by the thickness you have just added to the roof
To change the color of the fascia, select the roof and the color like any other object with the color tool on the top of the Turbocad window


To scale the texture, press the Edit button, the Render Manager window opens. You now see the Shingles1 material highlighted. Select Texture below and enter the values shown in the image below without touching the Shader and File name boxes

Click OK, and then click OK again in the Properties window. Here is your roof looking like a real roof !
note : The Roof tool is available on the Turbocad Deluxe, Turbocad Professional and Turbocad Pro Platinum versions. These 3 versions are available in free trial version and fully functional for 30 days :-). Click on the blue links to learn more about


Then make a right click on its icon, the Properties window appear. In the window go to the Wall category and make the following settings: Case Thickness: Enter 12 "or 305 if you are in metric system Case Height: Enter 96 "or 2438 if you are in metric system Case Reference : click left Then click OK.

Start drawing your walls at the bottom left of the drawing surface, enter the length and angle values in the boxes at the bottom left of the Turbocad window and press the Enter key and continue In the same manner clockwise. When the third wall is completed, right-click and select the Close command to close the room

Voilà, it is as simple as that :-)
To learn more about the Walls, see my post at this adress : http://turbocad-coffre-outil-dao-cad-toolbox.blogspot.ca/2017/02/turbocad-wall-tool-simple-use.html
note : The Roof tool is available on the Turbocad Deluxe, Turbocad Professional and Turbocad Pro Platinum versions. These 3 versions are available in free trial version and fully functional for 30 days :-). Click on the blue links to learn more about
Wants more Turbocad tutorials, go to this adress
Jean
Turbocad affiliate
Turbocad, the Alternative
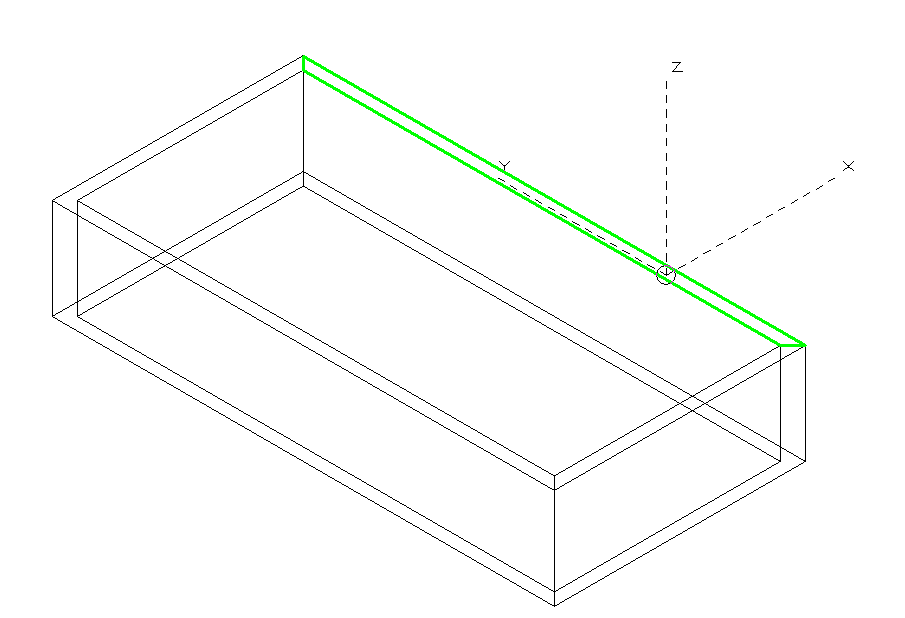
You are now on the right workplane. To ensure this, return to the Workplane toolbox and press the Show / Hide WorkPlane icon. A red dotted square appears to give you the orientation of the workplane


Select the front view and you see this same red line but this time horizontally and located on the top of the walls

Return to an isometric view. Now select the Roof tool from the drop-down menu
Architecture -- Roofs -- Add Roof

Now make sure the Vertex Snap mode is active and click the 4 top outer corners of your room. Once the fourth corner has been clicked, right click and select the Finish command (Alt + F)

Change the viewing angle of your building so that you can see it clearly Congratulations you have just created your first roof in 3D with the Add Roof tool of Turbocad !

note : The Roof tool is available on the Turbocad Deluxe, Turbocad Professional and Turbocad Pro Platinum versions. These 3 versions are available in free trial version and fully functional for 30 days :-). Click on the blue links to learn more about
Now go further by changing the angles of the slopes, add a roof overhang and a fascia
Edit and add items to the roof
We will now add volume to the roof by adding a roof overhang of 16 inches (406mm). Select the roof, right click on it, the Properties window appear and go to Roof category

In the Overhang box, enter 16 "or 406 if you are in the metric system and click OK.

Roof slope
To change the slope of the roof, select the roof and right click on it, the Properties window appear. Select Roof in the left box of the window. In the Slope box, for example, enter the value 30 for 30 degrees. Click OK to view the result
Fascia
Add a thickness to the slopes of the roof, which will be an 8 inch (200mm) fascia. Select the roof, right click on it, the Properties window appear. Then go to the Roof category.
In the Thickness box, enter 8 "or 200 if you are in the metric system and click OK. You will see the fascia appear by the thickness you have just added to the roof
To change the color of the fascia, select the roof and the color like any other object with the color tool on the top of the Turbocad window

Roof covering
Our roof is a bit dull, let's add it a texture of asphalt shingles. Select the roof, right click on it, the Properties window appear. Then go to the Roof components category. In the Components category select Top, from the Renders pull-down menu select RedSDK, from the Category pull-down menu select Shingles and finally select Shingles1 from the Marerial drop-down menu.
To scale the texture, press the Edit button, the Render Manager window opens. You now see the Shingles1 material highlighted. Select Texture below and enter the values shown in the image below without touching the Shader and File name boxes

Click OK, and then click OK again in the Properties window. Here is your roof looking like a real roof !
note : The Roof tool is available on the Turbocad Deluxe, Turbocad Professional and Turbocad Pro Platinum versions. These 3 versions are available in free trial version and fully functional for 30 days :-). Click on the blue links to learn more about

To build the basic walls of this tutorial
Select the Wall tool from the drop-down menu Architecture -- Walls -- Wall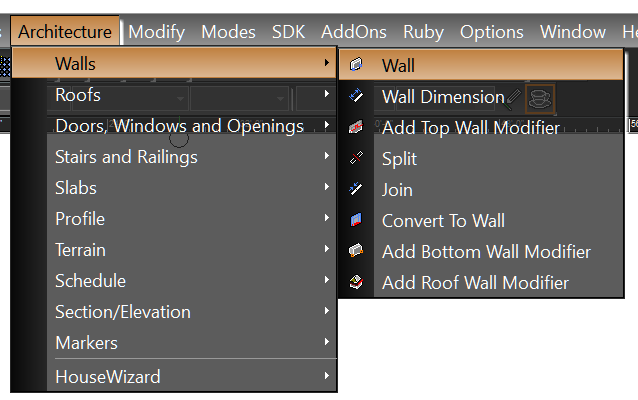
Then make a right click on its icon, the Properties window appear. In the window go to the Wall category and make the following settings: Case Thickness: Enter 12 "or 305 if you are in metric system Case Height: Enter 96 "or 2438 if you are in metric system Case Reference : click left Then click OK.

Start drawing your walls at the bottom left of the drawing surface, enter the length and angle values in the boxes at the bottom left of the Turbocad window and press the Enter key and continue In the same manner clockwise. When the third wall is completed, right-click and select the Close command to close the room

Voilà, it is as simple as that :-)
To learn more about the Walls, see my post at this adress : http://turbocad-coffre-outil-dao-cad-toolbox.blogspot.ca/2017/02/turbocad-wall-tool-simple-use.html
note : The Roof tool is available on the Turbocad Deluxe, Turbocad Professional and Turbocad Pro Platinum versions. These 3 versions are available in free trial version and fully functional for 30 days :-). Click on the blue links to learn more about
Wants more Turbocad tutorials, go to this adress
Jean
Turbocad affiliate
Turbocad, the Alternative