Use and base settings of Turbocad Wall tool
The Wall tool allows you to build 3D walls in one step, which makes it very efficient!
What you will see in this tutorial:
- Wall thickness and height configuration
- Insertion point during their creations (left, right, center)
- Determine their lengths and angles
- How to cut the walls
- Apply different textures on each side of these
note: in an upcoming tutorial I will show you that this tool also offer many other advantages like the insertion of doors and windows, composition of walls, modify the top and bottom of the walls, ect ... Several of these functionalities are configured From the Styles Manager, another powerful tool from Turbocad :-)
note : The Wall and Wall - Split tool is available on the versions, Turbocad Professionnal and Turbocad Pro Platinum. These 2 versions are available in free trial version and fully functional for 30 days :-) Click on the internet links in blue to learn more about
How to access the Wall tool
By its icon in the Menu BarFrom the Architecture drop-down menu at the top of the Turbocad window: Architecture - Walls - Wall
Configuring wall thickness and height
Right click the Wall icon, the Properties window appears. Click the Wall sub-section on the left side of the window. In the Thickness box enter 12 "or 300mm if you are in a metric system. In the Height box enter 96" or 2438 if you are in metric. Leave the window open for further configurations. The continuation of the configurations continues below
Point of insertion during their creations (left, right, center)
Still in the Properties window, in the Reference section select Left for the purposes of this tutorial. See also note below
Note: we select Left so that the wall lengths we enter the outer corners of the walls when we draw them clockwise. As you can guess, choose Right if you want your walls in a counter-clockwise direction. Choose Center if the lengths you enter correspond to the center of them.
The Autocleanup, End Caps and Show direction elements are optional and here is a short description
Autocleanup: if checked, shows the spacing between the walls
End Caps: closes the ends of walls
Show direction: shows the direction in which the walls will be create
Determine the lengths and angles of the walls
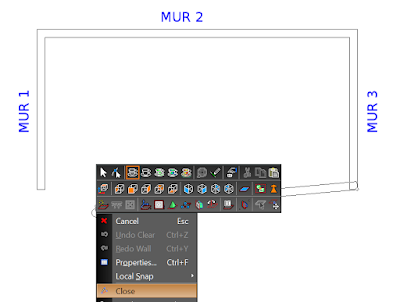
Of course you can draw your walls in a free way by clicking at various places on the drawing surface. To build them precisely, we will use the boxes Lenght and Angle located at the bottom left of the window of the software TurbocadClick in the lower part of the drawing area, click in the Lenght box or press the TAB key on your keyboard and enter 20 feets or 6096mm if you are in metric, click in the Angle box or press the TAB key and enter 90 then the key Enter.
Zoom to see fully the first wall. In the same way, build Wall 2 with a 40 feets long (12192mm) and Wall 3 with a length of 20 feets (6096mm). Once the third wall is built, right click and press Close.
With the Top view select, we will now add a piece of 20 feet (6096mm) x 20 feet. Make sure that Snap mode Nearest on graphic is the only one selected. Drag the cursor on the top wall so as to locate the left wall as in the image below and draw the other 2 walls as you did previously
note : The Wall and Wall - Split tool is available on the versions, Turbocad Professionnal and Turbocad Pro Platinum. These 2 versions are available in free trial version and fully functional for 30 days :-) Click on the internet links in blue to learn more about
Cut a wall
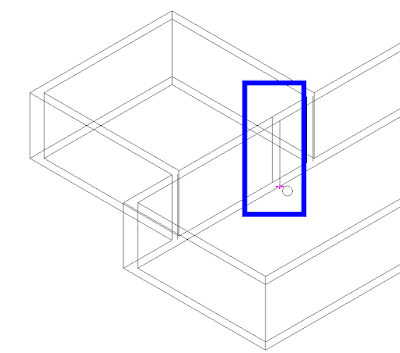
Rotate the assembly to have an Isometric SW view as the image below in Wireframe mode
We will now create an opening in the adjoining wall. Select the Split tool by going to the drop-down menu Architecture - Walls - Split
Point the cursor where you want to make the first cut on the wall, on the bottom or top of the wall. Then click once, the wall is selected. Click again and the first cut is made. To help you, use the Nearest on graphic snap mode
Apply different textures on either side of a wall
Select this new wall and right click. Select Properties, the Properties window opens. Select the sub category Wall slides in the left part of the window.
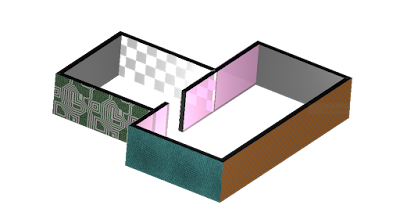
In the Side box, select Left. In the Material subsection, make your choice of texture. When finished, change the Side value to Right and make your choice of texture. Click OK.
Now select a Render type between Draft rendering, Quality rendering or Advanced rendering to enjoy your work :-)
Now just have fun !
note : The Wall and Wall - Split tool is available on the versions, Turbocad Professionnal and Turbocad Pro Platinum. These 2 versions are available in free trial version and fully functional for 30 days :-) Click on the internet links in blue to learn more about
Wants more Turbocad tutorials, go to this adress
Jean
Turbocad affiliate
Turbocad, the real Alternative


