mercredi 8 mars 2017

Turbocad - Insérer un vitrage dans une porte

Insérer une porte dans un mur c'est bien, mais une porte avec un vitrage c'est mieux !

Vous avez vu dans le tutoriel sur l'outil "Door" de Turbocad, disponible à cette adresse, comment insérer une porte dans un mur créer avec l'outil "Wall". Dans ce tutoriel vous verrez comment créer un vitrage avec carrelage dans une porte créée avec l'outil Door.
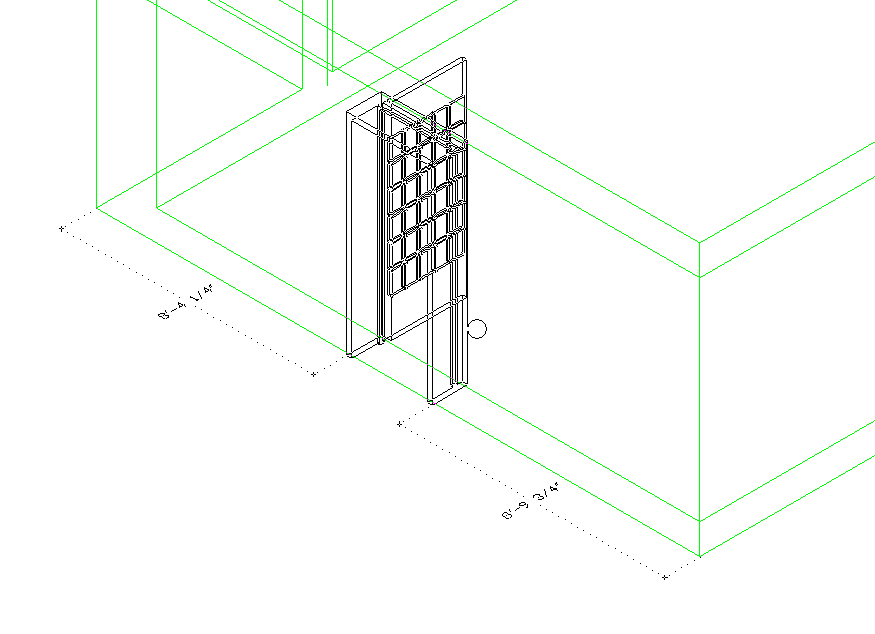


Pour les besoins de ce tutoriel, vous pouvez télécharger les murs de base à ces adresses :


nb : l'outil Door est disponible disponible sur les versions Turbocad Deluxe, Turbocad Professionnal et Turbocad Pro Platinum. Ces 3 versions sont disponibles en version d'essai Gratuite et pleinement fonctionnellles pour 30 jours :-)  Cliquez sur les liens internet en bleu pour en apprendre plus

Créez la porte

Avant d'aller plus loin vous allez entrez les valeurs de base de la porte soient ses dimensions et sa position verticale par rapport au plancher. Faites un clique droit sur l'icone de l'outil Door, la fenêtre Properties s'ouvre


Entrez les valeurs suivantes dans les champs correspondants :

  • Width (largeur) : entrez votre largeur de porte. Pour les besoins du tutoriel entrez 34" (864mm)
  • Height (hauteur) : entrez votre hauteur de porte. Pour les besoins du tutoriel entrez 7 pieds (2134mm)
  • Outside of frame (extérieur du cadre) ou Inside of frame (intérieur du cadre) : choisissez ici si la largeur et la hauteur de porte se définisse à l'extérieur ou l'intérieur du cadrage
  • Vertical alignment (alignement vertical) : sélectionnez Head of object (tête de l'objet)
  • Head height (hauteur de la tête) : entrez ici à quelle hauteur, par rapport au bas du mur, la tête de la fenêtre sera située.  Pour les besoins du tutoriel entrez 7 pieds (2134mm)

Ici je vais vous donnez les principales étapes à suivre pour la créer, vous pouvez vous référez à mon tutoriel "Turbocad - l'outil Door - Vraiment puissant" pour obtenir les étapes complètes pour la créer

Allez dans le Style manager, développez l'item Door styles et sélectionnez Standard. Ensuite cliquez sur l'icone Create a new style dans la barre d'icone sous Style manager


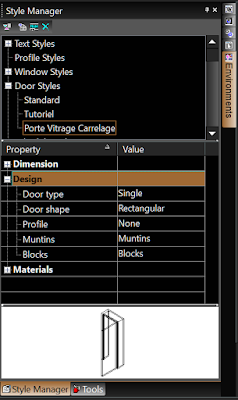
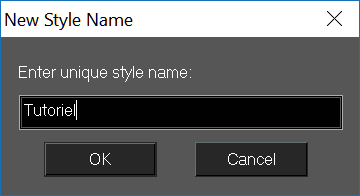
La fenêtre New style name s'affiche, entrez y un nom pour votre nouvelle porte. Pour les besoins du tutoriel je vais utiliser Porte Vitrage Carrelage


Maintenant sous Door styles, cliquez une fois sur votre nouveau nom de porte

Plus bas dans la fenêtre Style manager vous retrouvez l'item Dimension, développez le.


Entrez les valeurs suivantes dans les champs correspondants

  • Frame width (épaisseur du chassis extérieur de la porte), entrez 2" ou 50mm
  • Frame depth (profondeur ou épaisseur du mur), entrez 14" ou 356mm pour ce tutoriel. Assurez-vous que cette valeur soit légèrement supérieur à l'épaisseur de votre mur sinon votre porte ne sera pas visible dans les rendus Quality render et Advanced Render. La raison étant que votre fenêtre sera insérer au centre du mur
  • Stop width ( épaisseur de la moulure qui retient la porte), entrez 1" ou 25mm
  • Stop depth (profondeur de la moulure qui retient la porte), entrez 2" ou 50mm
  • Door thickness (épaisseur de la porte) : entrez 1 3/4" (44mm)
  • Glass thickness (épaisseur du vitrage), pour les besoins de ce tutoriel entrez 1/8" (3mm)
  • Auto adjust to width of wall, *** ne cochez pas cette option car elle ne fonctionne pas bien sur une des versions de Turbocad et je ne me souviens plus laquelle
Maintenant développez l'item Design
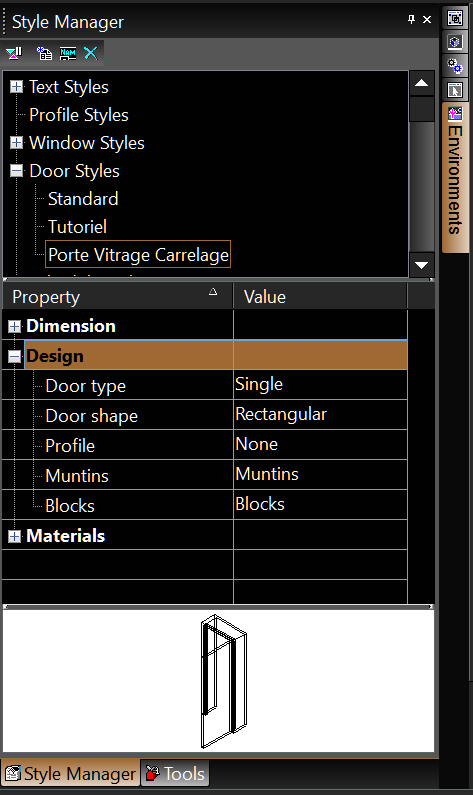

Sélectionnez les valeurs telles qu'elles apparaissent dans l'image ci-haut soient :

  • Door type (type de porte) : pour les besoins de ce tutoriel choisissez Single (une seule) en cliquant dans la case juste à côté (colonne Value). Turbocad vous en offre tout un choix, amusez-vous à les essayer :-)
  • Door shape (forme de la porte) : pour les besoins de ce tutoriel choisissez Rectangular (rectangulaire) en cliquant dans la case juste à côté (colonne Value). Plusieurs autres formes vous sont aussi proposer à vous de les essayer !
  • Profile : le Profile est utilisé lorsque vous allez créer votre profil pour l'insertion de votre vitrage. Ne sélectionnez pas de Profile, nous allons y revenir plus loin dans ce tutoriel
  • Muntins : Vous allez utilisez cette option pour inclure votre carrelage. Laissez ce champ tel quel nous allons y revenir plus loin dans ce tutoriel
  • Blocks : Offre la possibilité d'intégrer un bloc déjà créé. Cette option ne fait pas l'objet de ce tutoriel
Sauvegardez le fruit de votre travail en cliquant sur l'icone Apply Style Changes


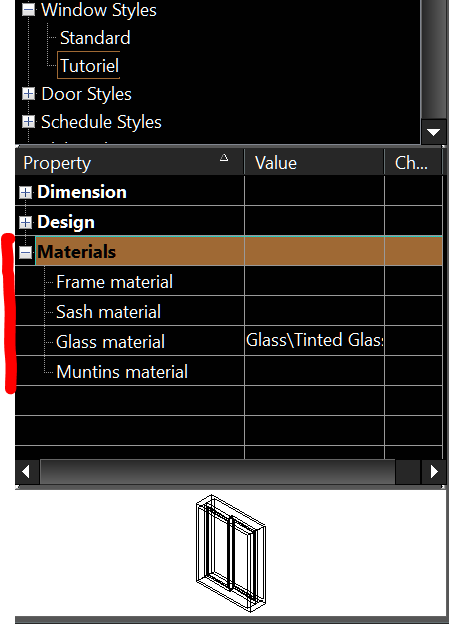
Maintenant développez l'item Materials, Le seul item que vous allez changez ici est le Glass material (Matériau du verre ou texture)


Cliquez dans le champ juste à droite (Value) de Glass material, la fenêtre Materials s'ouvre. Entrez les valeurs correspondantes à celles de l'image ci-dessous


Cliquez sur Ok et sauvegardez le fruit de votre travail en cliquant sur l'icone Apply Style Changes

Votre style de porte est maintenant créé !

nb : l'outil Door est disponible disponible sur les versions Turbocad Deluxe, Turbocad Professionnal et Turbocad Pro Platinum. Ces 3 versions sont disponibles en version d'essai Gratuite et pleinement fonctionnellles pour 30 jours :-)  Cliquez sur les liens internet en bleu pour en apprendre plus

Créer le vitrage et le carrelage

Tombons maintenant dans le vif du sujet soit le vitrage et le carrelage que vous allez inclure dans la porte

Toujours dans le Style manager, revenez dans l'item Design et cliquez dans la case à droite (Value) de Muntin, La fenêtre Muntin s'ouvre. C'est ici que nous allons définir les dimensions du matériel qui composera le carrelage


Cliquez sur le bouton Add, la fenêtre Muntins block s'ouvre, Entrez les valeurs suivantes : 


  • Name (nom) : pour les besoins de ce tutoriel j'utiliserai Carrelage
  • Glass component (composants du verre) : sélectionnez All si ce n'est pas déjà fait. Pour ce qui de l'option Single, je ne l'ai pas expérimenté encore
  • Muntin (matériau composant le carrelage) : width (largeur) sera 1/2" (13mm), Depth (profondeur) : sera 1/2" (13mm)
  • Lights : Pattern (modèle) pour les besoins de ce tutoriel ce sera Rectangular (rectangle)  Lights high (nombre de rangées) : pour les besoins de ce tutoriel ce sera 6,  Lights wide (nombre de colonnes) pour les besoins de ce tutoriel ce sera 5

Les autres items de cette fenêtres ne font pas l'objet de ce tutoriel

Cliquez sur OK

Nous allons maintenant créer un Profile pour notre vitrage

Dans le Style manger, cliquez une fois Profile Styles et cliquez sur le bouton Create a new style. La fenêtre New Style Name s'affiche, Inscrivez Carrelage comme nom et cliquez sur le bouton OK


Une page blanche en vue Isométrique s'affiche dans l'espace à dessin. Sélectionner l'outil Rectangle, cliquer dans l'espace à dessin et déplacer le curseur de façon à ce qu'un rectangle commence à se dessiner tel que dans l'illustration ci-dessous. Entrez les dimensions suivantes pour ce rectangle qui représente votre porte:


Cases situées en bas à gauche de la fenêtre de Turbocad. Size A :  84 pouces (2134mm)  et Size B :  34 pouces (864mm)

Appuyez sur Entrée (Enter). Utiliser Zoom extents (Ctrl + Backspace) pour voir l'entièreté du rectangle

Dessinez un deuxième rectangle de la même façon avec les dimensions suivantes pour cet autre rectangle qui représente votre vitrage:

Size A : 72 pouces (1829mm) et Size B : 22 pouces (559mm) 

Appuyez sur Entrée (Enter). Utiliser Zoom extents (Ctrl + Backspace) pour voir l'entièreté des rectangles

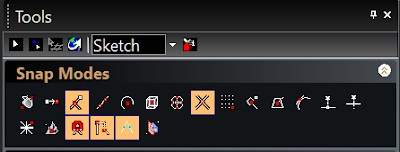
Maintenant sélectionnez le petit rectangle et placez le de façon qu'il soit parfaitement centrer dans le plus grand. Vous pouvez vous aidez des outils Snap modes Middle point et Intersection, de l'outil Show magnetic point, Extended Ortho et Appearent intersection Voir image plus bas


Sélectionnez les deux rectangles, allez dans le menu Modify et cliquez sur Place on Workplane (Flèche vers le haut + Alt + W)


Sélectionnez l'outil Edit Boundary Profiles accessible à partir du menu déroulant Architecture -- Profiles -- Edit Boundary Profiles et sélectionnez le plus grand rectangle, faites un clique droit et cliquez sur Finish


Sélectionnez l'outil Edit Hole Profiles accessible à partir du menu déroulant Architecture -- Profiles -- Edit Hole Profiles et sélectionnez le plus petit rectangle, faites un clique droit et cliquez sur Finish


Pour terminer le Profile vous avez deux choix, si vous avez le bouton de validation représenté par un crochet rose en haut de la fenêtre Style manager, cliquez dessus. Sinon avec l'outil de sélection sélectionnez les deux rectangles, faites un clique droit et sélectionnez Finish Block/group Editing complètement au bas du menu (faites descendre le menu avec la petite flèche au bas du menu)


Vous revenez dans la vue isométrique des murs en 3D, retournez dans le Style manager et développez le Door Styles, choisissez le style Carrelage, ensuite développez la sous section Design. Cliquez dans la case à côté de Profile et choisissez l'item Carrelage


Maintenant faites un clique droit sur l'outil Door et sélectionnez Properties et allez dans General. Au bas de cette fenêtre, allez dans la sous section Door Styles et  cliquez son menu déroulant et choisissez le style de porte que vous venez de créer et cliquez sur le bouton OK


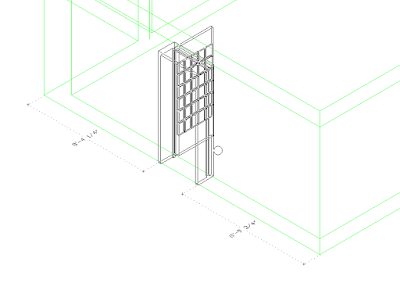
Vous êtes maintenant prêt à insérer vos nouvelles portes avec l'outil Door :-). Sélectionnez le et déplacez votre curseur et voyez une pote se déplacer avec des cotes au bas de celle-ci. Elles représente les distances entre le bout de murs et les côtés de votre porte, ceci afin de faciliter sa localisation. Cliquez à l'endroit que vous souhaitez la positionner. 

Note : vous pouvez vous déplacez sur touts les murs créer


Félicitations vous avez complété le tutoriel avec succès !

nb : l'outil Door est disponible disponible sur les versions Turbocad Deluxe, Turbocad Professionnal et Turbocad Pro Platinum. Ces 3 versions sont disponibles en version d'essai Gratuite et pleinement fonctionnellles pour 30 jours :-)  Cliquez sur les liens internet en bleu pour en apprendre plus

Vous voulez plus de tutoriels de Turbocad, cliquez ici

Jean
Affilié Turbocad

Turbocad, la réelle Alternative

jeudi 2 mars 2017

Turbocad - The Window tool

La version en FRANÇAIS de ce tutoriel se trouve à cette adresse

The Window tool allows you to create a Window Style and insert it directly into a wall


The Window tool allows you to create a Window Style with its own characteristics (dimensions, type, ect.) And insert it directly into a wall created with the Wall tool I describe its use in this tutorial or download one of these files depending on the version of your Turbocad : Version 2014 and ultérior  Version 2015 and ultérior


note : the Window tool is available on versions Turbocad Deluxe, Turbocad Professionnal et Turbocad Pro Platinum. These 3 versions are available in free trial version and fully functional for 30 days :-)  Click on the links in blue to learn more

Ce que ce tutoriel vous propose :


  • Create a window style with the Style manager
  • How to access the Window tool
  • Inserting a window into a wall created with the "Wall" tool of Turbocad


Create a window style with the Styles manager

Before going further you must define the size of your window as well as the height of the head of it. Access the Window tool from the Architecture - Doors, Windows and openings -- Window pull-down menu


Right click on its icon, the Properties window opens, click on the category Window main


Enter the following values:


  • Width : Enter your window width. For the tutorial requirements enter 4 feet (1220mm)
  • Height : Enter your window height. For the purpose of the tutorial enter 5 feet (1524mm)
  • Case Outside frame or Inside frame : Choose here if the width and height of the window is defined outside or inside the frame
  • Vertical alignment : select Head of object
  • Head height : Enter here at what height, with respect to the bottom of the wall, the head of the window will be located. For the purpose of the tutorial enter 7 feet (2134mm)

The other elements of this page are not the subject of this tutorial. I leave you a short description


  • Still height : not defined
  • Frame inset : the distance between the front of the wall and the window frame.
  • Open percent : percentage of window opening
  • Rise : the distance between the top corner and the top center, in the case of arched or pointed windows.
  • Leaf : In the case of irregular windows, the size of one of the panes


Styles manager as such


Access the  Style manager by scrolling the menu Tools -- Workspace -- Customize...


The Customize window opens. Select the Palettes tab and check the Style Manager and click Close at the bottom of the window


In the Style manager window, click on "+" at the left of Window styles, click once on Standard under Window styles


Push the button Create new style


The New style name window open, Enter a name for your new window style and click on OK


Still in the Style Manager window, expand, in the Property sub-section, Dimension by clicking the "+" sign to its left. This is where you will enter the width and depth of the framing and the moldings that hold the glazing


  • Frame width : entrer 2" or 50mm
  • Frame depth : entrer 14" or 356mm fir this tutorial. Make sure that this value is slightly greater than the thickness of your wall, otherwise your window will not be visible in rendering Quality render and Advanced Render. The reason being that your window will be inserted in the center of the wall
  • Sash width : entrer 2" or 50mm
  • Sash depth : entrez 2" ou 50mm
  • Glass thickness : entrer 1/8" or 3mm
  • Auto adjust to width of wall, *** Do not check this option because it does not work well on one of the versions of Turbocad and I do not remember which one
Before continuing, you will save the changes you have just made by pressing the button Apply styles changes In the top of the Style manager window


Let's continue with the Design part or you will choose the type of window and its shape. Expand the Design part by clicking on the "+" to its left


  • Window type : For the purpose of this tutorial choose Glider (sliding) by clicking in the box next to (Value column). Turbocad offers you a choice, have fun trying them out :-)
  • Window shape : For the purpose of this tutorial choose Rectangular By clicking in the box next to it (Value column). Several other forms are also available
  • Profile : The Profile is used when you have created a profile to change the shape of the window or add holes. This option is not included in this tutorial.
  • Muntins : Offers the possibility of including a tile in the window. This option is not included in this tutorial.
  • Blocks : Offers the possibility of integrating an already created block. This option is not included in this tutorial.


Note that when you select a window type, it appears at the bottom of the Style Manager window

Remember to save the changes you just made with the Apply styles changes button as described above

Let's finish our modifications with the Materials part. Expand it by clicking on the "+" button on its left


  • Frame material : Allows you to select the material (texture) of the window framing. To do this, simply click on the box on the right (Value column). Keep the default value for the purposes of the tutorial
  • Sash material : Allows you to select the material (texture) to use for the border that holds the glazing. To do this, simply click on the box on the right (Value column). Keep the default value for the purposes of the tutorial
  • Glass material : Allows you to select the type of glazing you want to use. For the purposes of this tutorial choose Glass -- Tinted Glass from the Materials window accessible by clicking the box next to Glass material (Value column)
  • Muntins material : Allows you to choose a material (texture) for tiling if you have one


Congratulations you have just created your first window style with the Turbocad Window tool!

note : the Window tool is available on versions Turbocad Deluxe, Turbocad Professionnal et Turbocad Pro Platinum. These 3 versions are available in free trial version and fully functional for 30 days :-)  Click on the links in blue to learn more


How to access the Window tool


To access this tool 2 choices are available to you either, through the Menu bar


Or from the drop-down menu Architecture -- Doors, Windows and openings -- Windows


Inserting a window into a wall created with the "Wall" tool of Turbocad


At the beginning of this tutorial you have entered the dimensions of the window, location in height of it, ect ...

Now we will set the Window tool to use the window style you have set. Right-click the Window tool icon. The Properties window opens. Click on the General category to the left of the window. At the bottom of the window in the Window styles sub-section, select the name of the style you just created. In this tutorial is Tutorial. Click the OK button


The Window tool sélected and in Isométric view, Let's get to the heart of the matter, the window insertion into the walls!

Move the cursor over the drawing surface and go along the walls. You now see a window that moves on the wall that you have chosen, you also see dimensions with measures that moves with this one. 

These dimensions describe the distances left and right between the end of the wall and the side of the window. This way you can position the window in the desired location. They are dynamic i.e. change according to the position of the window. The desired position of the window is found, click where your cursor is and the window will be inserted automatically!


To precisely position them, draw reference lines at the places you want to insert your windows on the workplane under the walls. Use the snap modes to help you locate them


You can also insert the windows in top view (Worldplan) to facilitate the task


Have fun adding window to your dream home, enlarging, new layout, ect ....  :-)


Related tutorial : The Door tool

note : the Window tool is available on versions Turbocad Deluxe, Turbocad Professionnal et Turbocad Pro Platinum. These 3 versions are available in free trial version and fully functional for 30 days :-)  Click on the links in blue to learn more

Wants more Turbocad tutorials, go to this adress

Jean
Turbocad affiliate

Turbocad, the real Alternative

Turbocad - The Door tool - Really powerfull

La version en FRANÇAIS de ce tutoriel se trouve ici

The Door tool allows you to create a door style and insert it directly into a wall

La version en FRANÇAIS de ce tutoriel se trouve ici

The Door tool allows you to create a door style with its own properties (dimensions, type, ect.) And insert it directly into a wall created with the Wall tool whose use I describe in this article or Download one of these files depending on the version of your Turbocad : Version 2014 et ultérior  Version 2015 et ultérior


note : The Door tool is available on the Turbocad Deluxe, Turbocad Professional and Turbocad Pro Platinum versions. These 3 versions are available in free trial version and fully functional for 30 days :-) Click on the links in blue to learn more

What this tutorial offers you:

  • Create a door style with Style Manager
  • How to access the Door tool
  • Inserting a door into a wall created with the tool "Wall" of Turbocad


Create a door style with Style Manager

Before going further you must define the size of your door as well as the height of the head of it. Access the Door tool from the drop-down menu Architecture -- Doors Windows and openings -- Door


Right click on its icon, the Properties window opens, click on the category Door main


Enter the following values:


  • Width : Enter your door width. For the purposes of the tutorial enter 34" (864mm)
  • Height : Enter your door width. For the purposes of the tutorial enter 7 feets(2134mm)
  • Outside of frame or Inside of frame : Choose here if the width and height of the door can be defined outside or inside the frame
  • Vertical alignment : select Head of object
  • Head height : Enter here at what height, with respect to the bottom of the wall, the head of the window will be located. For the purpose of the tutorial enter 7 feet (2134mm)

The other elements of this page are not the subject of this tutorial. I leave you a short description


  • Thershold : not defined
  • Frame inset : The distance between the front of the wall and the door frame.
  • Open percent : Percentage of door opening, 50% corresponds to 90 degrees
  • Rise : The distance between the upper corner and the upper center, in the case of  doors with arc or point.
  • Leaf : In the case of irregular doors, the size of one of the panels

Styles manager as such

Access the Style Manager by unrolling menu Tools - Workspace - Customize ... 


The Customize window opens. Select the Palettes tab and check the Style Manager and click Close at the bottom of the window


In the Style Manager window, click the "+" button to the left of Door styles, then click Standard once under Door styles


Press the button Create new style


The New style name window poen, Enter a name for your new door style and click OK


Still in the Style Manager window, expand, in the Property sub-section, Dimension by clicking the "+" sign to its left. This is where you enter the width and depth of the chassis


Translation will be completed soon, please come back later :-)
  • Frame width : entrer 2" or 50mm
  • Frame depth :  Enter 14 "or 356mm for this tutorial Make sure that this value is slightly greater than the thickness of your wall otherwise your door will not be visible in render Quality render and Advanced Render The reason is that your door will be inserted in Center of the wall
  • Stop width : entrer 2" or 50mm
  • Stop depth : entrez 2" or 50mm
  • Door thickness : entrer 1 3/4" (44mm)
  • Glass thickness : For door types including travel. This item is not included in this tutorial
  • Auto adjust to width of wall, *** Do not check this option because it does not work well on one of the versions of Turbocad and I do not remember which one

Before continuing, you will save the changes you just made by pressing the Apply styles changes button at the top of the Style Manager window


Let's continue with the Design section or you will choose the type of door and its shape. Expand the Design part by clicking on the "+" to its left


  • Door type : For the purposes of this tutorial choose Single by clicking in the box next to (Value column). Turbocad offers you a choice, have fun trying them out :-)
  • Door shape : For the purpose of this tutorial choose Rectangular by clicking in the box next to (Value column). Several other forms are also offered to you to try them!
  • Profile : The Profile is used when you have created a profile to change the shape of the door or add holes. This option is not included in this tutorial.
  • Muntins : Offers the possibility of including a tile in the glazing of a door. This option is not included in this tutorial.
  • Blocks : Offers the possibility of integrating an already created block. This option is not included in this tutorial.

Note that when you select a door type it is displayed at the bottom of the Style Manager window

Remember to save the changes you just made with the Apply styles changes button as described above


I'm just scratching the Materials part. Expand it by clicking on the "+" button on the left. I give you a brief description of the options it offers


  • Frame material : Allows you to select the material (texture) of the door frame. To do this, simply click on the box on the right (Value column). Keep the default value for the purposes of the tutorial
  • Stop material : Allows you to select the material (texture) to use for the stop that holds the door. To do this, simply click on the box on the right (Value column). Keep the default value for the purposes of the tutorial
  • Panel material : Allows you to select the material (texture) to use for the door itself (panel). To do this, simply click on the box on the right (Value column). Keep the default value for the purposes of the tutorial
  • Glass material : vous permet de sélectionner le type de vitrage que vous voulez utiliser si votre porte en comporte un. To do this, simply click on the box on the right (Value column). Keep the default value for the purposes of the tutorial
  • Muntins material : Allows you to choose a material (texture) for the glazing tile if your door has one. Keep the default value for the purposes of the tutorial

Congratulations you have just created your first door style with the Turbocad Door Tool!

Note: The Door tool is available on the Turbocad Deluxe, Turbocad Professional and Turbocad Pro Platinum versions. These 3 versions are available in free trial version and fully functional for 30 days :-) Click on the links in blue to learn more


How to access the Door tool


To access this tool 2 choices is offered to you either, by the Menu bar


Or by the drop down menu Architecture -- Doors Windows and openings -- Door


Inserting a door into a wall created with the "Wall" tool of Turbocad


At the beginning of the article you have entered the dimensions of the door, location in height of it, ect ...

Now we will set the Door tool to use the Door Style you have set. Right-click the Door tool icon. The Properties window opens. Click on the General category to the left of the window. At the bottom of the window in the Door styles sub-section, select the name of the style you just created. In this tutorial is Tutoriel. Click the OK button


The Door tool selected and in Isometric view, let's get to the heart of the matter, inserting doors into the walls!

Move the cursor over the drawing surface and go along the walls. You now see a door that moves on the wall that you have chosen, you also see dimensions with measures that moves with this one.

These dimensions describe the distances, left and right, between the end of the wall and the side of the door. In this way you can position the door in the desired position. They are dynamic i.e. change according to the position of the door. The desired position of the door is found, click where your cursor is and the door is automatically inserted!


To position them precisely, draw reference lines at the places you want to insert your doors onto the workplane under the walls. Use the snap modes to help you locate them


You can also insert your doors in view of the top (Worldplan) to facilitate the task


Have fun adding doors to your dream home, enlarging, new layout, ect .... :-)


nte : The Door tool is available on versions Turbocad Deluxe, Turbocad Professionnal and Turbocad Pro Platinum. These 3 versions are available in free trial version and fully functional for 30 days :-)  Click on the links in blue to learn more about

Wants more Turbocad tutorials, go to this adress

Jean
Turbocad affiliate

Turbocad, the real Alternative